Netlify: Form Handling

Forms are a huge component of our application, they help us collect data and create personalized experiences on various platforms, applications, and more! In this article, we will be learning how to leverage Netlify, a serverless platform for deploying applications, to safely collect data via forms without using javascript or making calls to external APIs.
Netlify eases the handling of form submissions through its built-in form handling feature. This feature takes care of the collection of data and even has measures to increase security by reducing spamming in case we have functions that are triggered by the form submission.
So, how do we take advantage of this feature?
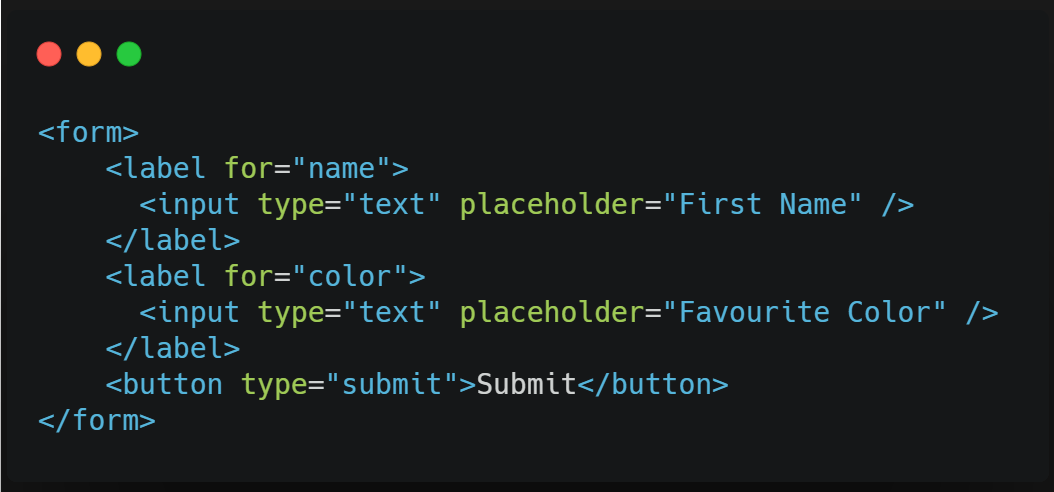
Let's create a basic form, our users would be able to input their first name and their favorite color.
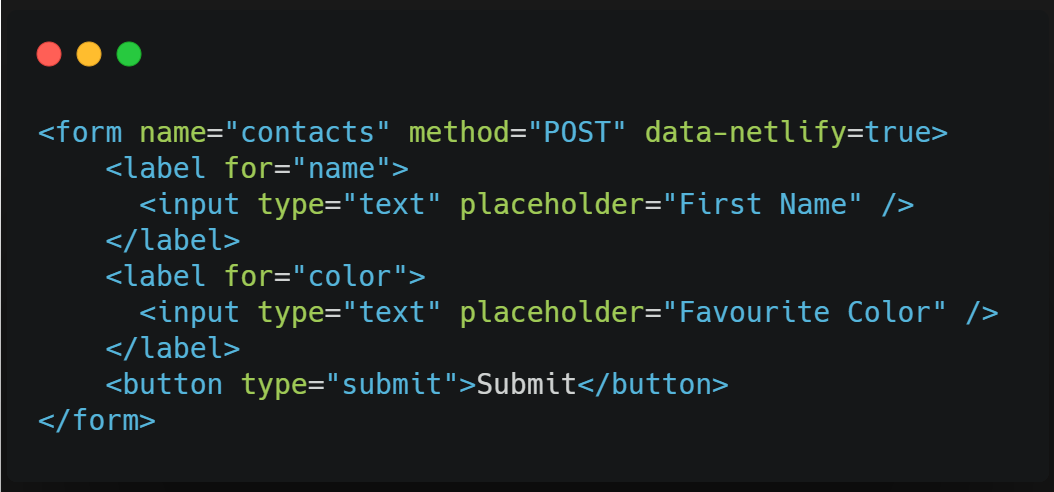
Usually, we'd have a function triggered when a user clicks the submit button, often to make a post request to a server with the form's data sent via the request's body. When deploying on Netlify, all we need to collect data from form submissions is to:
- Specify our method which will be the POST method.
- Add a name attribute that will be used to identify the form submissions on your Netlify admin panel. The value of the name attribute should be unique for every form.
- Then add a netlify attribute or data-netlify = true to the form tag.
When all these are added, our form would look like this:
Spam Filtering
Netlify filters all form submissions to protect against spamming, but an extra layer of protection against spamming can be easily added using a honey-pot field. The honey-pot field is to lure bots to complete a field that human users cannot see. When forms are submitted with this field completed, such form submissions will be rejected by Netlify. You can add a honeypot field and point netlify to such. Here's how:
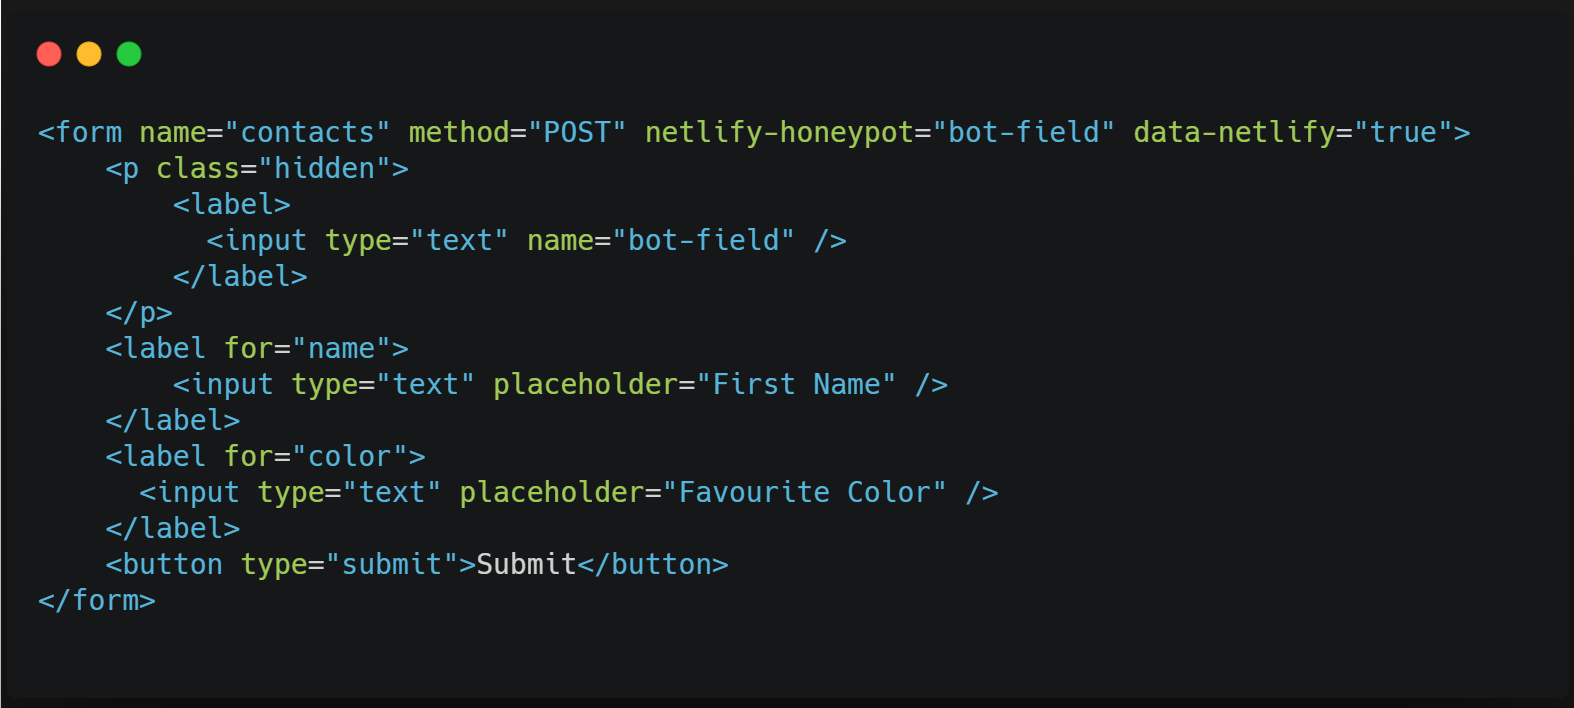
We add a netlify-honeypot attribute to the form tag, then add an input field with a name attribute that has the same value as our netlify-honeypot attribute. This input field would serve as our honeypot.
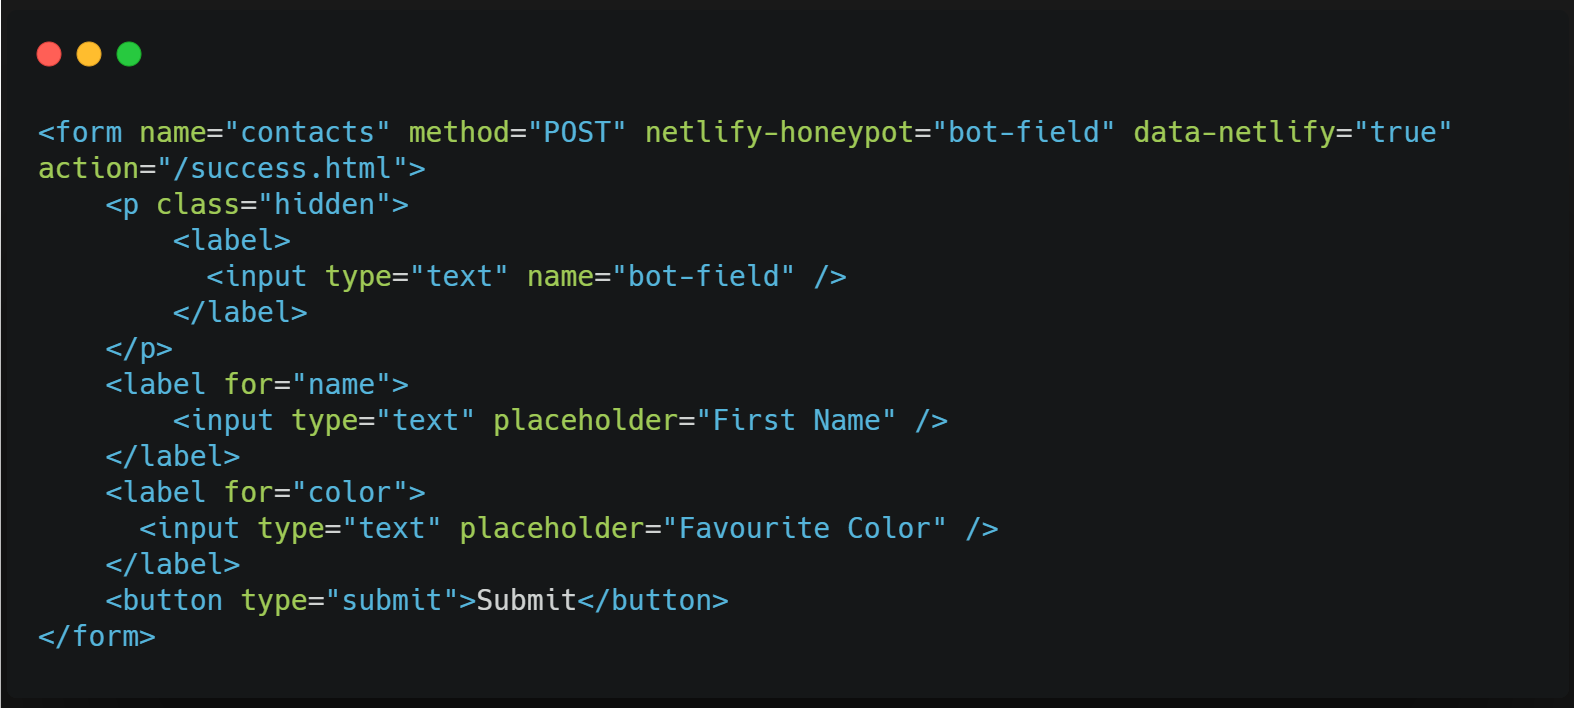
Success Pages
Once a user submits a form, the user is routed to a default success page. This success page can be replaced with a custom one by adding an action attribute to our form tag. The value of the action attribute would be the location of our success page relative to the root folder or the directory we are publishing from. Our form would look like this:
Leveraging this feature really comes in handy for websites or web applications that may not need a backend, a good example will be a form on our portfolio sites.
Netlify is an awesome pick for deploying web applications, you can find out more here. Happy hacking!

